Well, why not. Off-course I can tell you that is is usefull to monitor your node, but the truth is I always wanted to experiment with the ESP32 chip and I came across the BTCIOT Tutorial – LND Pussycat, node monitor. All the credits go to him. This gave me the opportunity to do a project with the ESP32 chip and make something usefull.
Since I had no experience with the ESP32 chip, nor with programming it, I’ll be describing every step I made (also the wrong ones).
Step 1 Download the Arduino IDE interface
In order to be able to program the developer module, you need some software. The Arduino IDE software is able to communicate with the ESP32chip after configuring some software:
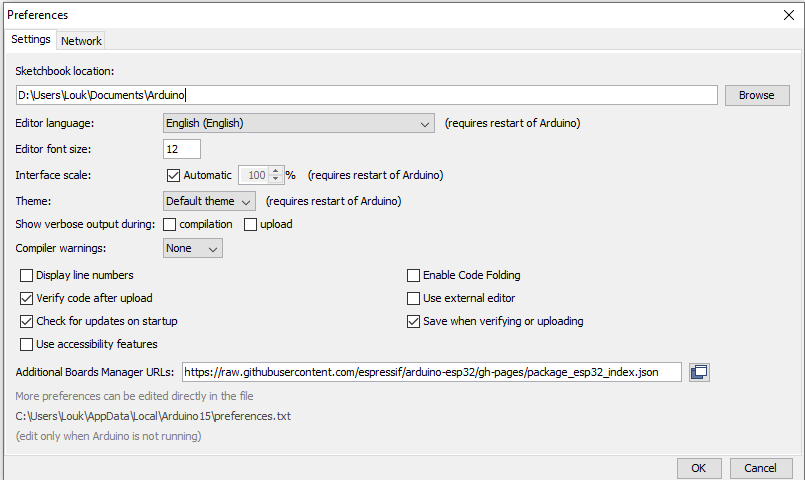
Add the following text in the additional board managers urls field and press ok: https://raw.githubusercontent.com/espressif/arduino-esp32/gh-pages/package_esp32_dev_index.json, https://raw.githubusercontent.com/espressif/arduino-esp32/gh-pages/package_esp32_index.json
In the Arduino IDE click on the Tools menu on the top menu bar.
Scroll down to the Board: entry (i.e. Board: Arduino/Genuino Uno).
A submenu will open when you highlight the Board: entry.
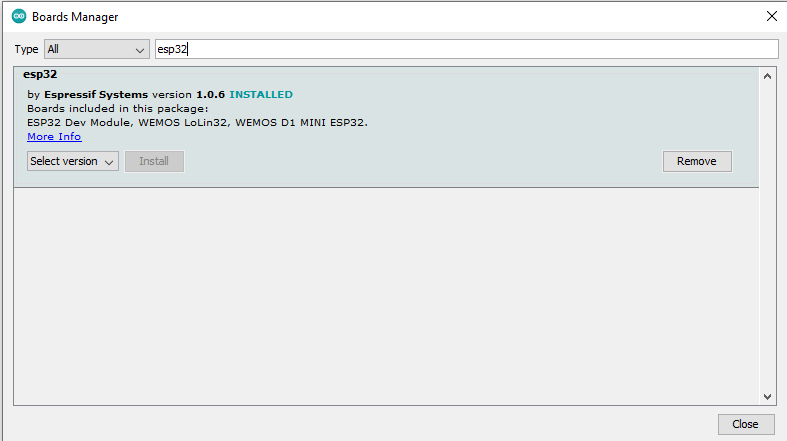
At the top of the submenu is Boards Manager. Click on it to open the Boards Manager dialog box.
In the search box in the Boards Manager enter “esp32”.
You should see an entry for “esp32 by Espressif Systems”. Highlight this entry select version 1.06 (later versions do not match the sound software) and click on the Install button.
This will install the ESP32 boards into your Arduino IDE
Go back to Tools/board. You’ll see lots of boards under ESP32 Arduino. Select your developer board (NodeMCU-32S in my case).
Now we’re ready to test a simple flashing light in the next step.